
SONAX Headlight Restoration Guide
By: Will C. @ Autopia | 2-22-2020
Cloudy Headlights Hindering Sight? Don't worry, we're here to help!
Cloudy. Dingy. Hazy. Whatever you want to call it, you certainly don't want to see it on your headlights! Many of today's modern vehicles are manufactured with polycarbonate plastic headlights, which are highly susceptible to UV damage. If not properly protected, oxidation starts to occur and creates a haze that not only ruins the appearance, it also hinders your vision. So, what are you to do if the damage is already done? You can reach for the SONAX Headlight Restoration Kit! This all-encompassing kit covers everything you need to restore your headlights back to their former glory, regardless of skill level. And no, we won't need any power tools to perform this restoration either. The SONAX Headlight Restoration restores headlights with its advanced abrasive technology that can be used by hand!
So, let's roll up our sleeves and dig in!
Before we get started in the restoration, make sure you are working with a clean surface. You can easily wash away any surface contamination with SONAX Car Wash before starting.
STEP 1: Sanding (Optional)
Stand back and fully inspect the level of oxidation. Can you see any interior components? Or, is the headlight completely blocked by oxidation? If the level of oxidation makes it difficult or impossible to see any of the interior components of the headlight, then you'll want to start with the sanding step. For lighter oxidation you can skip this and go straight to step 2.
Moisten the included sanding disc (p5000) and the headlight with water. With light pressure, sand the headlight with the sanding disc in a circular motion until an even, slightly matted surface is produced. While sanding, be sure to keep the headlight and sanding disc moist with water until finished. Once completed, you can use one of the included polishing cloths to remove any residue left on the surface.
 |  |
STEP 2: Polishing
Apply a quarter-sized amount of SONAX Headlight Polish onto the white side of the polishing sponge and start polishing with medium pressure in a circular motion until the desired level of level of shine is achieved. Continue to add polish as needed and check your work as you go. Use another polishing cloth to remove the excess polish residue.
 |  |
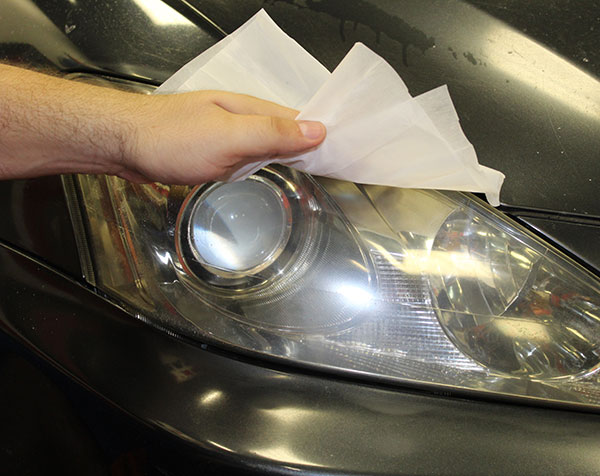
STEP 3: Polishing
Tear open the included SONAX Headlight Sealant sachet and unfold the moistened cloth. Carefully wipe the cloth over the entire headlight, distributing the sealant evenly. Allow to dry without touching again for at least 30 minutes. The one cloth is enough to cover two headlights.
NOTE: Normally, when treating rear taillights, sanding is not required. Do not attempt to remove deeper scratches with coarser sanding paper. A coarser abrasive paper will remove the headlights protective clear lacquer coating resulting in a faster reoccurrence of cloudiness and scratches.
 |  |
And, that's it. In just 3 simple steps you've officially restored your headlights back to their original luster and you'll be able to see much better next time you take a late-night ride! I bet you thought this was going to a complex procedure!
To make headlight restoration even easier for you, we've put the SONAX Headlight Restoration Kit on a limited time sale price, so get yours while supplies last!
Featured & Related Products: